
Editing videos like a professional doesn’t always require expensive software subscriptions. With the growing demand for accessible tools, open-source software has proven to be a powerful alternative. Whether you’re a beginner or an experienced editor, the right open-source software can provide you with all the features needed to produce high-quality videos without the hefty price tag. But what exactly does it take to elevate your editing skills using these free tools?
Start by Choosing the Right Software
Not all open-source video editing software is created equal. While they share the common trait of being free, each one has its strengths, so selecting the right tool for your needs is crucial.
Popular Open-Source Video Editors:
- Shotcut: Known for its user-friendly interface, Shotcut is great for beginners and professionals alike. It offers multi-format timeline editing, advanced audio filters, and 4K support.
- OpenShot: A robust option for those who need quick and effective edits. It includes basic transitions, effects, and keyframe animation, making it suitable for projects like YouTube videos or short films.
- Blender: Though mainly recognized for 3D modeling, Blender also features a powerful video editor. If you’re interested in adding visual effects or animation to your projects, Blender can be a great asset.
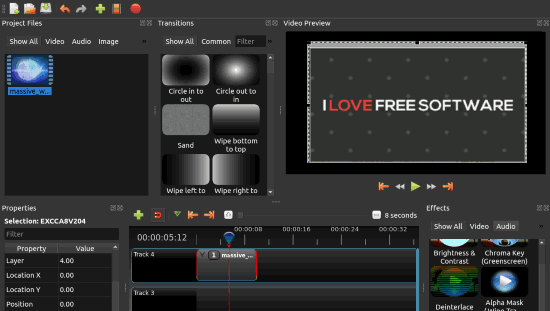
- Kdenlive: One of the most feature-rich open-source editors, it provides advanced editing features like multi-track editing, effects, and professional-grade timelines.
Get Comfortable with the Interface
Every video editor, whether open-source or paid, has a learning curve. Open-source software often provides extensive tutorials and community support, making the onboarding process smoother. Start by exploring the following:
- The Timeline: This is where your raw footage, audio tracks, and effects come together. Learn how to split, trim, and layer different media on the timeline.
- The Effects Panel: Mastering video and audio effects is essential for any pro-level editor. In software like Shotcut or Kdenlive, explore transitions, color grading tools, and audio equalizers.
- Keyframes: Many open-source video editors allow you to animate effects and transitions with keyframes. This is where precision becomes crucial, enabling you to fine-tune motion, opacity, and other visual effects frame by frame.
Master Key Techniques for Professional-Level Editing
Now that you’re familiar with your software of choice, it’s time to dive into the key techniques that will take your video editing to the next level.
1. Non-Linear Editing (NLE)
Non-linear editing allows you to work with different sections of your footage in any order without affecting the original file. Open-source editors like Kdenlive and Shotcut offer NLE systems that rival paid software. This means you can quickly cut and rearrange footage without worrying about damaging the source.
2. Color Grading and Correction
Color correction ensures that your footage is consistent in terms of exposure, contrast, and saturation, while color grading gives your video a specific look or mood. Most open-source software includes comprehensive color grading tools:
- Waveform Scopes and Histograms for precise exposure adjustments.
- Color Wheels for adjusting shadows, midtones, and highlights.
Spend time learning how to balance and stylize your footage through color correction to achieve a polished, professional look.
3. Audio Editing and Mixing
Audio plays an essential role in storytelling. Open-source editors often include a variety of audio editing tools. Kdenlive, for instance, allows you to manipulate multiple audio tracks, add effects, and correct issues like background noise or uneven levels. Learn to adjust audio levels, add fades, and synchronize voiceovers for a seamless audio experience.
4. Transitions and Effects
Smooth transitions can greatly enhance the flow of your video. Experiment with basic effects such as fades, dissolves, and swipes to see what best fits the mood of your project. Many open-source editors include both preset transitions and customizable options, allowing you to create unique visuals.
5. Motion Tracking and Animation
For more advanced editing, consider tools like Blender, which supports motion tracking and animation. This is particularly useful for adding 3D elements, text that follows a moving subject, or stabilizing shaky footage. While this requires practice, mastering motion tracking can significantly boost the quality of your videos.
Speed Up Your Workflow with Shortcuts
Once you’ve gained a basic understanding of your editing software, speeding up your workflow becomes important. Most open-source software allows you to customize keyboard shortcuts. Learn these for faster navigation:
- Cut and Split Clips: Quickly cut and split clips to remove unwanted sections or rearrange footage.
- Undo/Redo: A lifesaver for quick adjustments.
- Add Keyframes: When working on motion and effects, knowing your keyframe shortcuts can save time.
Exporting Like a Pro
No video editing project is complete without the proper export settings. Here’s where you fine-tune your project for its intended platform. Whether you’re uploading to YouTube or preparing a film for higher-resolution viewing, getting this right is critical.
Important Considerations:
- Resolution: Most editors allow you to export in various resolutions. For YouTube, 1080p is standard, but you can opt for 4K if your footage supports it.
- Frame Rate: Be consistent with your frame rate. If you shot at 30fps, ensure that your export matches it.
- File Format: MP4 (H.264) is the most widely used format for online distribution due to its balance of quality and file size. However, some platforms may prefer different formats like AVI or MOV.
Leverage Community Support and Plugins
One major advantage of open-source software is its community-driven development. If you’re facing challenges or looking to expand the capabilities of your editor, check out forums, Reddit threads, or even YouTube tutorials tailored to your specific software.
Many open-source editors support plugins or add-ons that extend their functionality. For example:
- LUTs (Look-Up Tables): Easily import custom color grading styles.
- VST Plugins: For enhanced audio effects like reverb or compression.
The more you engage with the community and explore available plugins, the more customized and powerful your editing setup becomes.
Practice Makes Perfect
Open-source video editing tools can equip you with all the features necessary to create professional-grade content, but like any skill, mastering video editing requires consistent practice. Start small, experiment with the various tools and features, and challenge yourself with more complex projects over time. By refining your editing workflow and techniques, you’ll soon realize that even with free software, professional-quality video production is well within reach.
With dedication, the right tools, and a willingness to learn, open-source video editing software can be your gateway to professional-level video editing. Dive into the software, explore its features, and watch your projects transform from amateur to polished creations.